
In the world of vaping, organizing your tanks and pods is crucial for a seamless experience. Whether you are a beginner or a seasoned vaper, using labels or stickers for tanks and pods can help you manage your devices and e-liquids more effectively. This article will delve into **how to use labels or stickers for tanks and pods**, providing tips, techniques, and best practices.
Understanding the Importance of Labeling
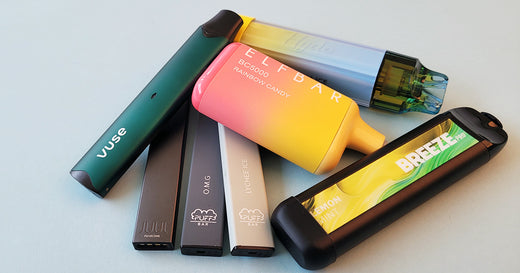
Why Label Your Tanks and Pods?
Labeling your tanks and pods is not just about aesthetics; it serves several practical purposes:
- **Identification**: With multiple flavors or nicotine strengths, labeling helps you quickly identify what’s in each tank or pod.
- **Organization**: Keeping your vaping gear organized can save time and enhance your overall experience.
- **Safety**: Clear labels can help prevent accidental misuse of products, especially if you have different types of e-liquids.
Types of Labels and Stickers
When it comes to labeling, you have several options. Here are a few common types:
– **Paper Labels**: These can be printed at home or purchased. They are cost-effective but may not be waterproof.
– **Vinyl Stickers**: More durable and often waterproof, these stickers are a great choice for long-term use.
– **Washi Tape**: A decorative option that can be easily customized but may not adhere as well as other labels.
How to Use Labels or Stickers for Tanks and Pods
Step 1: Gather Your Materials
Before you start labeling, gather all the necessary materials:
– Your tanks and pods
– Labels or stickers
– A permanent marker (if using blank labels)
– A ruler or measuring tape (optional)
Step 2: Choose Your Labeling System
Determine how you want to categorize your tanks and pods. Here are a few ideas:
– **By Flavor**: Label each tank or pod with the flavor it contains.
– **By Nicotine Strength**: If you use varying nicotine levels, consider labeling by strength.
– **By Date**: For those who like to keep track of when they opened a bottle, use dates as part of your labeling system.
Step 3: Create Your Labels
If you’re using blank labels, you can design them on your computer using software like Microsoft Word or Canva. Make sure to include essential information such as flavor and nicotine strength. If you’re using pre-made stickers, simply select the appropriate ones.
Step 4: Apply the Labels
Carefully apply the labels to your tanks and pods. Here are some tips for effective application:
– **Clean the Surface**: Ensure that the surface of the tank or pod is clean and dry before applying the label. This ensures better adhesion.
– **Position Carefully**: Take your time to position the label correctly. Once it’s stuck, it can be challenging to reposition without damage.
– **Press Firmly**: After placing the label, press down firmly to eliminate any air bubbles.
Step 5: Regularly Update Your Labels
Over time, you may change flavors or nicotine strengths. It’s essential to keep your labels up-to-date. If you frequently switch out e-liquids, consider using removable labels that you can easily replace.
Organizing Your Vaping Setup
Utilize Storage Solutions
Once your tanks and pods are labeled, consider implementing storage solutions to keep everything organized. Here are some ideas:
– **Containers**: Use small containers or baskets to group similar items together.
– **Drawer Dividers**: If you store your vaping gear in a drawer, dividers can help separate different types of tanks and pods.
– **Display Stands**: A dedicated display stand can make it easier to access your tanks and pods while keeping them organized.
Maintain a Clean Environment
Regularly clean your vaping area. Dust and clutter can make it challenging to find what you need. A tidy environment contributes to a more enjoyable vaping experience.
Conclusion
Understanding **how to use labels or stickers for tanks and pods** can greatly enhance your vaping experience. By keeping your tanks and pods organized, you not only save time but also ensure that you are using the right products safely. From choosing the right type of label to implementing an effective storage solution, the steps outlined in this article will help you stay organized and informed.
FAQs
1. What are the best materials for labels or stickers for tanks and pods?
When considering **how to use labels or stickers for tanks and pods**, vinyl stickers or waterproof paper labels are ideal for durability and longevity.
2. Can I create my own labels at home?
Yes! You can design and print your own labels at home using software like Microsoft Word or Canva, making it easy to customize them based on your needs.
3. How often should I update my labels?
It’s